Mastering Scene Transitions in OBS Studio
Welcome, readers! Understanding how to use transitions effectively is key for video creators looking to increase production value. Whether live streaming, filming, or other video production, solid transition knowledge elevates the viewer experience.
From subtle crossfades between scenes to flashy animated wipes between segments, transitions influence pacing, mood, and watchability. Though often neglected by beginners, transitions should be manageable.
This friendly guide breaks down transition techniques in OBS into easily digestible bits. We’ll explore basic transition editing, when to use specific transitions for maximum impact, customizing transitions to match your brand, and more. By the end, you’ll have a firm grasp on spicing up videos with smooth, stylistic transitions that audiences will love. Sound enticing? Then, let’s get started!
1. Understanding Scenes and Transitions
Before we delve into the nitty-gritty, let’s establish a solid foundation. Scenes in OBS Studio are like different sets of a stage. Each scene represents a specific configuration of sources (such as video captures, images, text overlays, etc.) you want to display during your stream, more on Scenes in the previous article.
Transitions, on the other hand, are the smooth animations that occur when switching between these sets. Think of them as the magical portals that transport your viewers from one scene to another!
2. Adding Scene Transitions in OBS Studio
Let’s start with the basics. Adding a Scene Transition, here’s how you can do it:
1. Open OBS Studio: If you haven’t already, download and install OBS Studio. And launch the application from Start Menu or Desktop Shortcut. If you’ve already done this, give yourself a pat on the back. You’re one step closer to becoming an OBS wizard!
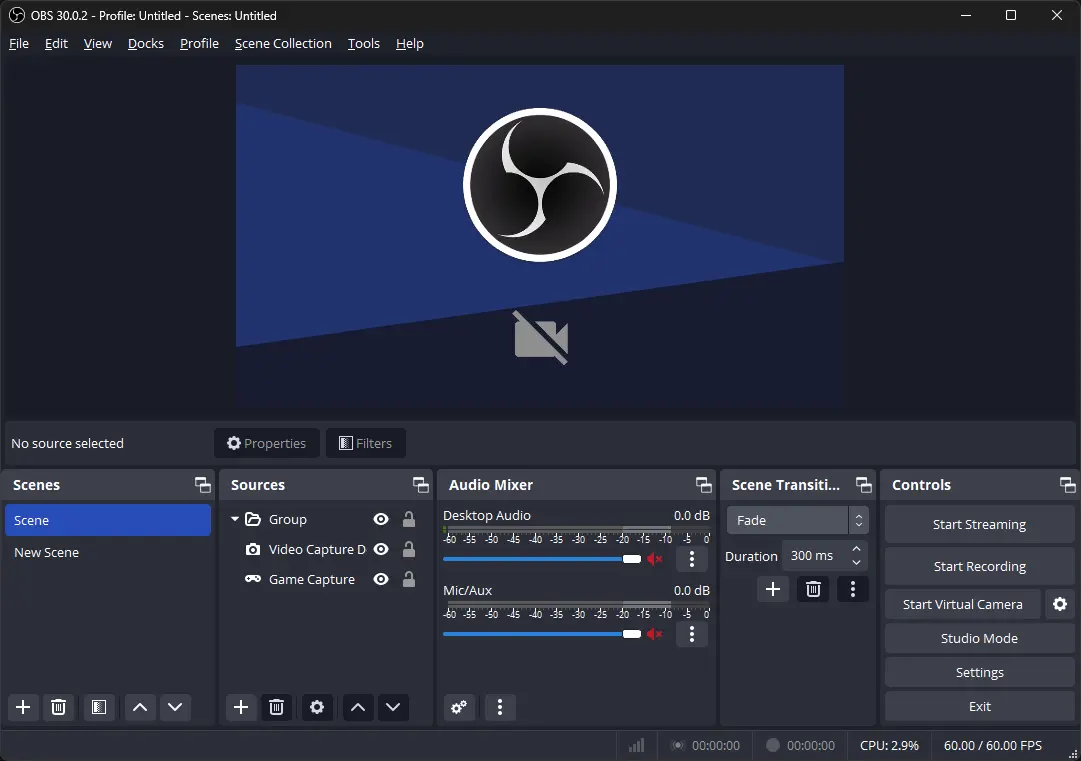
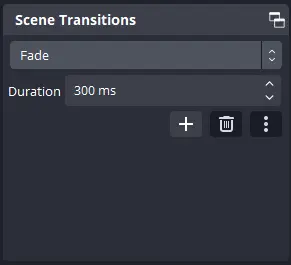
2. Transition Options: Look for the Transition options between the Preview and Program displays. You’ll find buttons for transitions like “Cut” & “Fade.” It’s like having a magic wand at your fingertips!
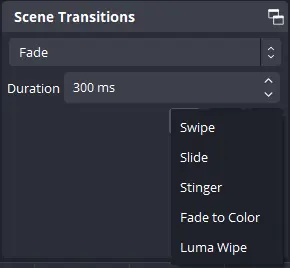
3. Quick Transitions: Click the “+” button next to Quick Transitions. Choose your preferred transition from the drop-down list. OBS Studio provides several built-in transitions from which to choose. It’s like a buffet of visual delights!
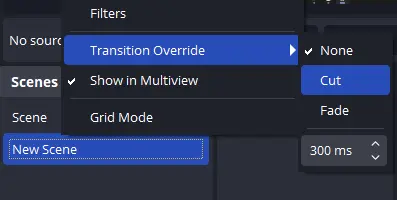
4. Customizing Transitions: You can customize transitions further. For instance, To change the transition after every new scene:
Right-click on the scene.
Set Transition Override to your preferred transition.
Select the other Scenes and do the same with them.
Using a Video as a Transition
Now, let’s explore a powerful technique using a video as a transition; here are some exciting possibilities that come with it:
1. Stinger Transitions: Create professional-looking transitions with custom animations. For example, you can use a stinger transition with your logo or a themed animation. It’s like having your own special effects team! Stinger transitions are one of the most professional-looking transitions. In OBS Studio, you provide your transition video and a black-and-white version of that video, where white is scene ‘A,’ and black is scene ‘B.’
2. Advanced Movements: Combine the scene transition plugin with other powerful plugins to achieve advanced movements. Imagine smoothly zooming into a specific source or rotating scenes like a pro. You’ll be the Michael Bay of streaming!
4. Perfecting Your Transitions
To make your transitions flawless, consider the following tips:
1. Timing: Pay attention to the timing of your transitions. Too short, and they’ll feel abrupt; too long, and they’ll lose impact. Experiment to find the sweet spot. It’s like baking a cake – timing is everything!
2. Audio Transition: Remember audio! Adjust audio levels during transitions to maintain a seamless experience for your viewers. Remember, your stream isn’t just a visual feast – it’s an auditory banquet, too!
3. Overlay Transitions: Overlay elements (like alerts, chat boxes, or donation bars) should transition smoothly along with your scenes. Use the same transition style for overlays to maintain consistency. It’s like choreographing a dance – every move should be in sync!
5. Transition Scenes for Different Content
Remember that transitions can set the tone for your content. Here are some ideas:
1. Gaming Streams:
- Use dynamic transitions (like swipes or fades) during intense moments. It’s like adding an extra dash of spice to your gaming curry!
- Consider custom transitions related to the game you’re playing. It’s like wearing a themed costume to a party – it just adds to the fun!
2. Talk Shows or Podcasts:
- Subtle transitions (such as cuts) work well for interviews or discussions. It’s like smoothly passing the conversation baton from one speaker to another.
- Use scene transitions to switch between hosts or segments. It’s like turning the pages of a well-written book – each transition leads to a new chapter!
3. Creative Streams:
- Get creative! Use unique transitions that match your artistic style. It’s like painting with a palette of transitions!
- Animated overlays can enhance the transition experience. It’s like adding sprinkles to your streaming sundae!
6. Testing and Tweaking
Finally, test your transitions thoroughly. Preview them, adjust duration, and ensure they align with your stream aesthetics. Remember that consistency is key. It’s like tuning a guitar – every string must be harmonious. In this case, every transition needs to be in harmony.
Conclusion
Mastering scene transitions in OBS Studio will captivate your audience and create a professional streaming environment. So go ahead, experiment, and let your creativity flow.
And remember, in the world of streaming, you’re the director, the actor, and the editor. So take control, have fun, and keep streaming! 🚀
Happy streaming! 🎥🌟
Related Guides
OBS Studio Version 30.0.2
Detailed Guide to Use OBS Studio on Linux
